Guitar Of The Month – April, 2022
Congratulations goes out to Robert Aubin for his guitar build, to earn him Guitar of the Month for April 2022.
Robert used our SGK-20 DIY kit as the basis to create his guitar.
“I’ve wanted to have and play an SG for a long long time. After 30+ years of playing and a current collection of 21 guitars I just never got an SG. Discovering DIY kits and SOLO music which had really good reviews, I decided a DIY kit would be the way to go as well as a great way to further explore my love of the instrument.
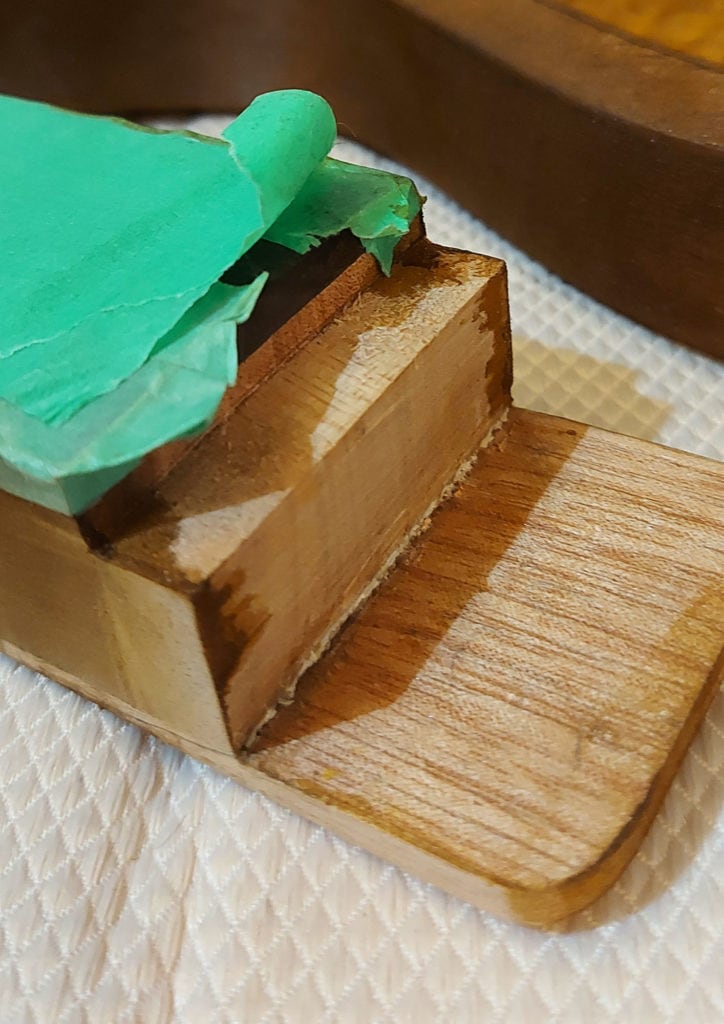
My selection was a beautiful flame maple capped version. But work got in the way as well as some hesitation about exactly what I was going to do with it; what colours, how will I apply it, etc etc. Once I had some sort of idea I was ready to order my first kit. I purchased the SG which coincidentally had just shown up as a B-stock item. The info and photos provided of the repaired neck heel looked good and something I could work with if it became an issue.
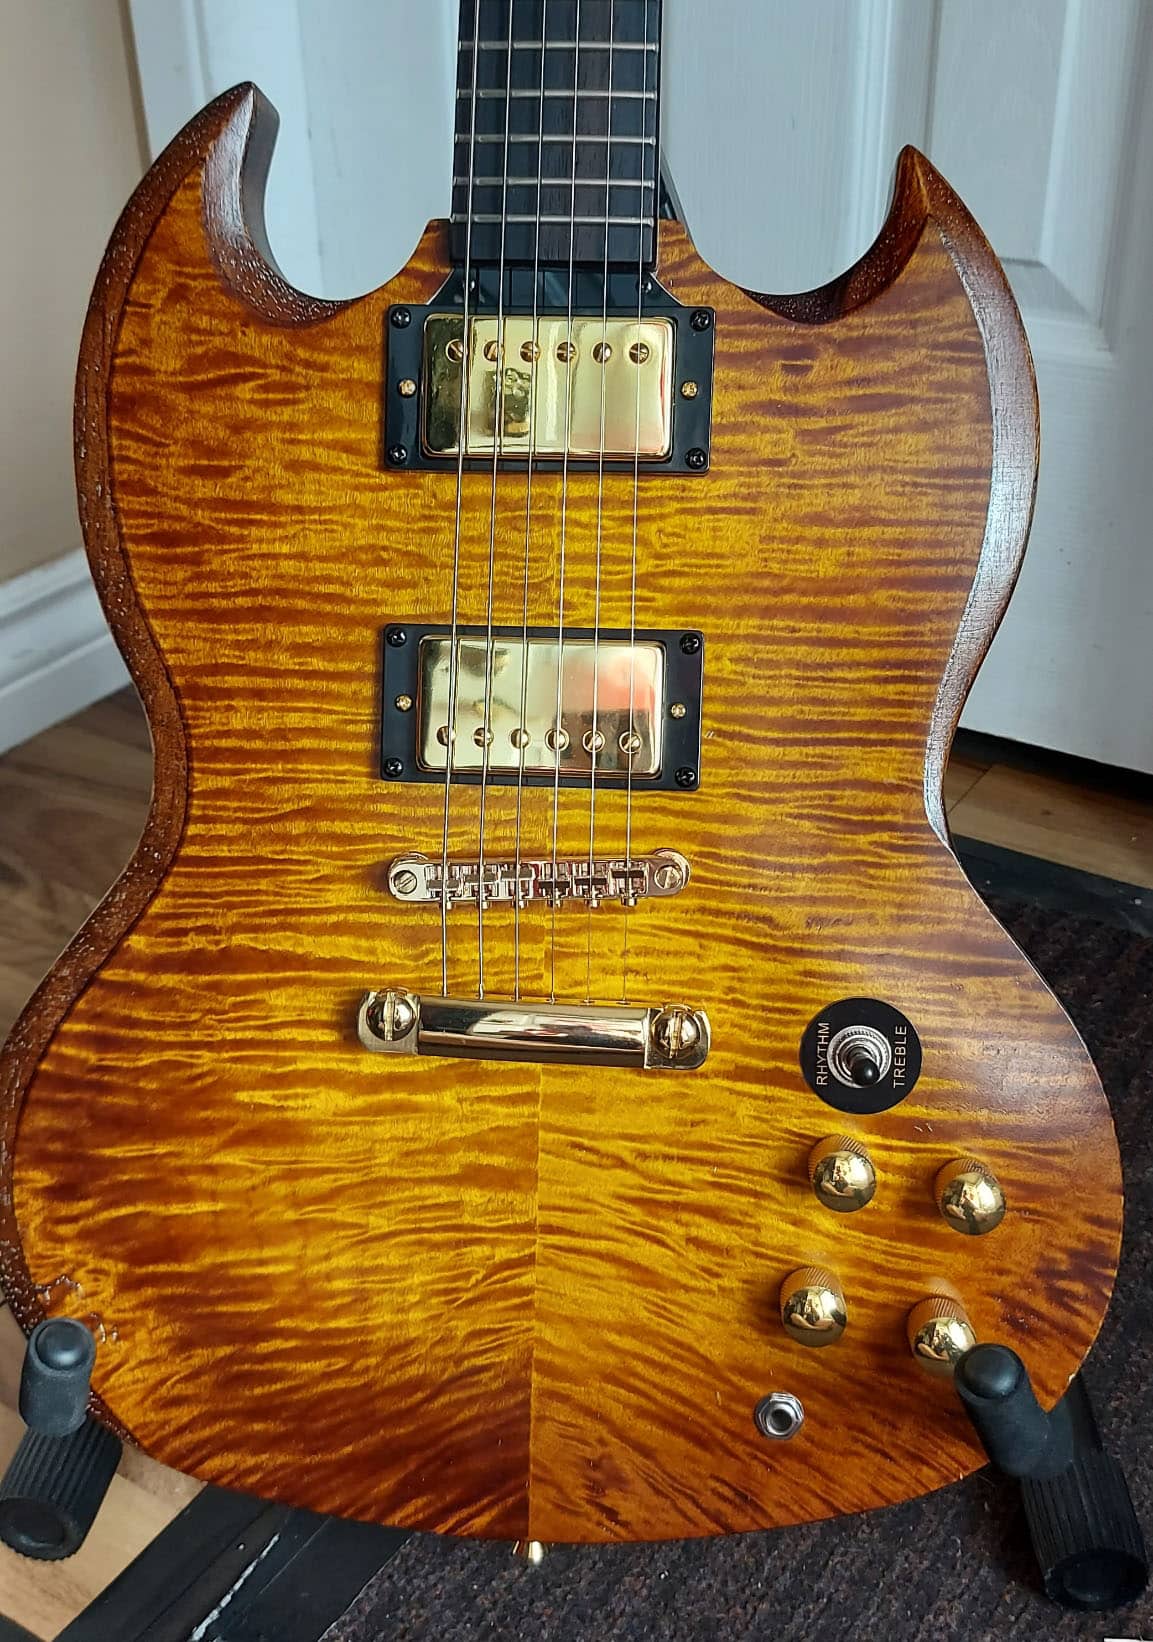
I was hesitant to do anything with it other than admire it, and I was particularly concerned with how to treat the bevels on the front of the guitar, where it goes from mahogany to the maple cap. The top was gorgeous and I didn’t want to rush into ruining it, yet I resolved to get her started and dove in with the colours and processes I finally decided to use. I learned that I really like warm tones with my guitars and chose a brown to yellow blend and gold hardware.
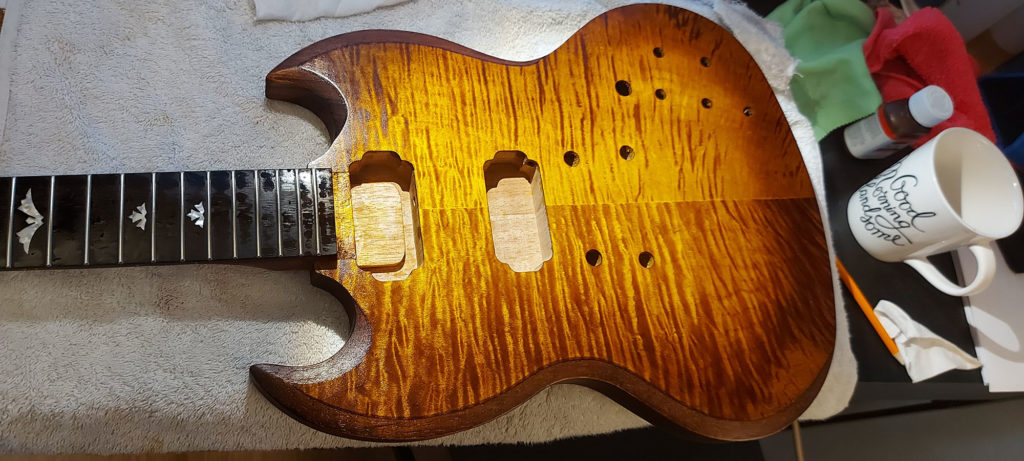
I ordered KEDA powder dyes which I had never used before. I made mixes of all the powders and stored them in squeeze bottles. I tested these out on some spare wood, where I played with applying and blending. The browns and yellows came out to me and I saw immediate potential with those colours. The entire body and neck got a quick once over with 440 grit sanding block, taking out any high or rough feeling spots. Then everything got a varsol wipe down. To apply the stain, I poured some of the premix in to small bowls where I would dip my clean cotton rag and apply from there. I put 2 coats of brown to the entire body and neck, and let that dry for the day. Next I sanded down the flame maple front with 320/400 block, wiped it down with varsol, and applied the yellow/brown mix and yellow to the centre. The colours were easy to work with and blend how I wanted. I applied and worked with the stains pretty wet, which I think made it easier to work with. If it got too wet or too dark it was easy to sop up or move around. The remainder of the staining process was to sand down with a 400/600 block, where I wanted to bring back some of the darker or tones, cleaned with varsol, then reapply and let dry.
Once the staining was complete it was time to start with the truoil. The mahogany back and sides were applied with a rag but while wet I used a 240/320 sanding block and immediately rubbed the mahogany to create a bit of a “sludge” which acted as a filler. The entire body and neck received about 12 coats with a light rub down with 600 grit pad and then just a cloth. My buffer pads finally came in the mail and I used that on my last coat to make the finish as smooth as possible. I rubbed in some turtle wax paste a few times and gave that a buffing and cloth wipe down to complete the finish. After a few weeks of applying the stains, still learning as I go, I found my concern about the beveling just worked itself out as the colours blended well with a slight hard line at the mahogany/maple transition which I liked very much. With a little background in art, I learned that by converting photos into black and white you can see the tonal values much better, and I used those as a reference to balance out my final staining.
After a dry fit and measure, the neck pocket needed just a little sanding before gluing with some titebond. The next day I began applying truoil. After 6 coats, this was when I decided to put on my headstock flourish. Assisted with a stencil, I outlined it with a small marker then hand-painted with gold enamel. Then 6 more coats of truoil and 3 coats of turtle wax to complete the finish.
I was excited to finish her with gold hardware I collected over the last couple of years. Everything fit nicely as is and just dropped into place. New strings, a complete setup, and I’m a very happy guitar player with a great looking, playing, and sounding SG!
It was a great experience and I look forward to doing another solo kit. Most likely that beautiful ESK-35, but maybe a maple top tele as well, yes I love maple tops.
Thanks Solo for a great kit and an all-around great experience!”
-Robert Aubin


5 Responses to “Guitar Of The Month – April, 2022”
You’ve done a beautiful job there. I love the colors you chose, and your method really made the flame stand out. Congratulations on a well deserved guitar of the month build, and thank you for providing such rich detail on the methods you used.
Thanks, thats nice of you to say. It was a great kit!
She’s a beauty! Did u name her. What did you use for headstock logo
Thanks
Thanks for that! No, i dont name my guitars. If I did though, I’d name it “Slice ‘o pie” for the baked pie crust look, lol.
For the headstock logo, I bought a couple packs of stencils from amazon. Tested those out and decided on a pattern. I kind of then and there decided to use a thin line marker to draw in the outline. I then used an enamel(oil-based) gold paint that i used for hobby paints, and hand painted in the gold. Touched up some black edges. Then once dry continued to lay about 6 more coats of truoil, with no smearing or any distortion or blending with the paint/marker. So that worked out.
Much Thanks. I ended up going to a local printer and had some vinyl
stickers made on clear. Should be ready shortly. May try out or
research stencil as I’m sure it’s not as expensive.