Guitar Of The Month – December, 2023

Congratulations goes out to Christopher Ryan for his guitar build, to earn him Guitar of the Month for December 2023.
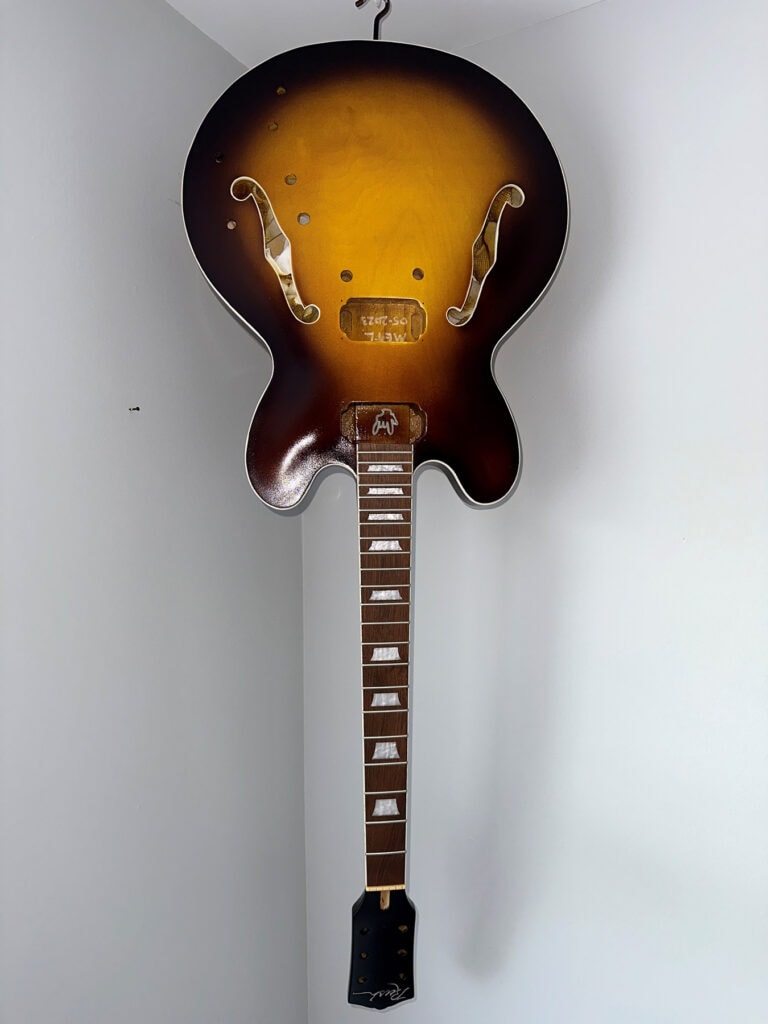
Christopher used our ESK-35T kit as the basis to create his guitar.
“In 2020 I got the guitar building bug semi-building an EVH Super 78 tribute guitar (black/white stripe).
Rush is my all time favorite band and Lifeson bounces between my #1 and #2 George Lynch. When Peart passed I decided to make a tribute guitar to ol’ Al.
I first wanted to make a Whitey but couldn’t find a kit that was close enough to my limited skills and tools. So I went for the ES335. The first 3 Rush albums were written on the 335 and I dig tobacco sunburst. I found the 335 kit on Solo Guitars and the price was right for my skill level (if I jacked it up I wouldn’t be to heavily invested… right!!) Plus I could get the lacquer to go with the kit in one stop.
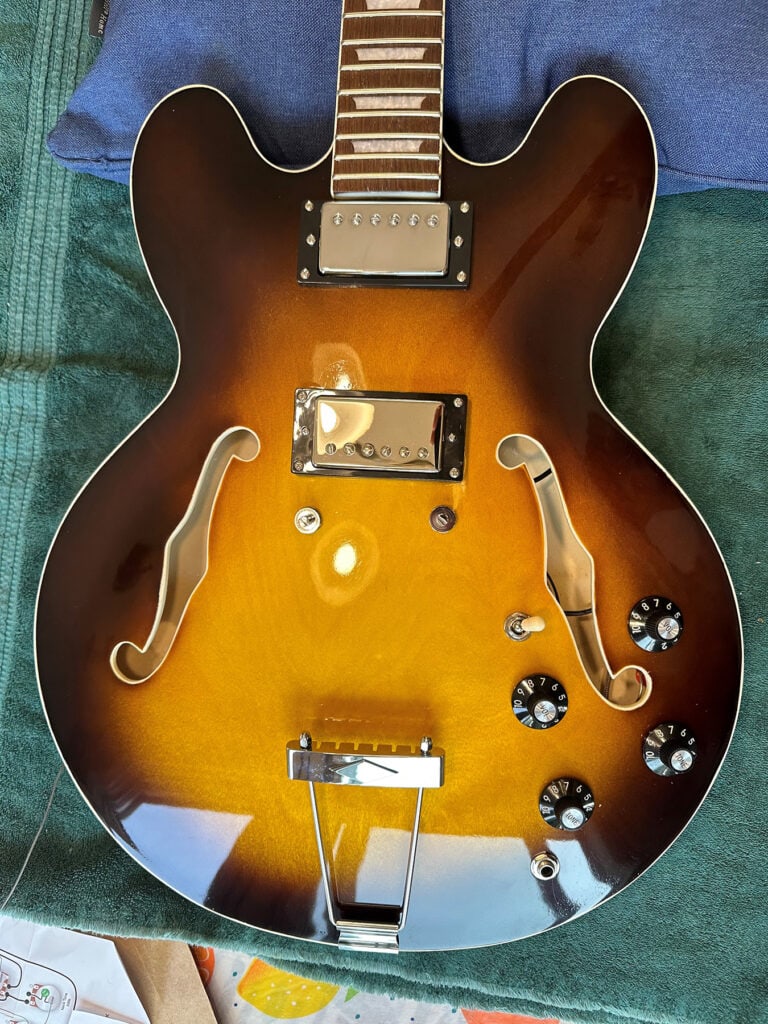
I wanted to make the guitar as accurate as possible with some better parts and after scouring hundreds of photos I upgraded tuners to Grovers with the knobs looking super close to Al’s 335. I bought a Gibson Tailpiece to match the original, a Gotoh bridge and Gibson Witchhat knobs to match. I had a Duncan JB laying around so I decided to stick that in the bridge and use a kit humbucker in the neck. Found a dude on Etsy that engraves pickguards and truss rod cover plates and had had the truss rod cover engraved LERXST… Al’s nickname from Ged.
I test fitted the neck to body and ran a straight edge off the neck just to see we were within tolerance. I started small to get my feet wet and began with the headstock. I sanded off any sealer put on the guitar for shipping with 400 grit. I used a can of black Gloss lacquer and Clear Gloss Lacquer. I shot about 10 coats of black and let that cure while I figured out what kind of logo I wanted on the headstock. I found 2 hirez images of the starman and my favorite Rush typeface from Hemispheres as making homemade waterslide decals is useless. No decal maker will touch copyrighted imagery so I broke out the wife’s cricket and learned how to cut stencils out of vinyl. I took measurements of the headstock and started resizing the logos in Photoshop. I printed 3 different sizes of each on paper and cut out the shape and started mocking up what did and did not work size wise. Finalized the size of each logo and cut out on the cricket. I practiced setting the vinyl “stickers” on some wood. It became apparent that due to the size of the starman the cricket couldn’t handle the tiny detail and getting the tiny lines of the star off the sheet with out trashing it was futile. Good thing I love Hemispheres and it looked better on the headstock anyway. I printed it on gold and silver vinyl as an option and silver won the day. I did a light scuff of the black paint and set the Rush logo into position. After it set for 24 hours, I shot 25 coats of clear gloss to bury the decal. I’d shoot 3 layers a day and on the 9th layer I would level sand. Shoot more layers of clear and level sand until it was 100% flat and buried in the clear. Let that cure about 30 days and began the final level sand and polish sanding. So the YouTubes said when wet sanding be careful cause if you get too much water on the bare wood around the lacquer you will crack your lacquer. I did. I wish I bought some paste wax and not jam cotton balls in the tuning peg holes and the truss cover screw holes. I developed small hairline cracks. Live and learn. The only save would be to strip it and start over. Not happening!
The neck to body fitment was money. Tight enough that I didn’t need clamps to hold it into position as I started verifying the scale and angle to the bridge. All measurements were in the margin of error as I could tell. The neck heel might have need some small sanding to get the angle of the neck at the body down just a smidge but I didn’t want to chance it. So I left it. L to R of neck to the bridge and pickup was pretty good. Scale was a little off and the neck was not 100% square to the body so I hand sawed about a 1/8 inch off and sanded the front of the heel square to fit better. Glue it! Let dry and tape fretboard and headstock.
Now the fun part. Painting. I watched a ton of videos on painting guitars with nitro. Should I tape the bindings or just scrape? After taping the F holes I decided I’m not taping the bindings. I should have spent the time to mask the bindings. With a ton of practice it is easy to master. I was afraid my masking would not be exact enough or wobble on to the body and I have a bare spot in the finish. If that happened you would be looking at toothpicks now instead of a cool guitar!
I have airbrushes and a compressor as one of my other hobbies is building 1/35th scale model tanks and men. But I needed an hvlp gun for this size of job. I bought a cheap NEIKO 1mm gun and an air pressure regulator for the airline. Attach the regulator at your gun and open up the air adjustment knob on the gun all the way open. You want your gun to blow consistent air and adjusting that at the compressor is no bueno. The regulator is the way to go. It’s right there at the gun so it is easy to make air flow adjustments. I have a 3.5 gallon craftsman compressor. Follow your hvlp’s recommended psi settings. After adjusting the paint flow and fan size on a piece of scrap cardboard I was ready to go. I started with the amber first. Always try to work light to dark. I sprayed 3 coats of amber and was happy with the depth of color. Next was the tobacco. I started on the back of the guitar body to practice how I was gonna move the airbrush to create the fade and tear drop shape. If I mess it up who cares no one will see it. I started with creating the tear drop shape and worked out to the edges. I did light coats to get the feel. I did 6 coats of tobacco. The great thing about nitro is it dries fast. So any dust blobs that fell on the finish while drying I took 1200 grit sandpaper and lightly scuffed it off working in one direction. DO NOT muscle it off. Light strokes and it comes off. The other nice thing about nitro is it melts into itself. So spray a light coat of the color over the scuffed area and it disappears. I had some tobacco over spray specs in the amber from spraying the edges. I light sanding with the 1200 grit and shot some amber over it and it cleaned up nice. The added surprise was that also smoothed out my fade between the colors a little more.
Waited an hour and peeled the tape off the F holes and got to scraping. Here is where I wished I spent some time finessing my masking skills and masked the binding. Scraping the binding is not as easy as the pros make it look!! lol.. I made a scraper with a razor blade like I saw in a vid. I wasn’t gonna buy the pro scrapers for one job. The razor blade sucked. So I broke out my xactos I use for my tank kits. Covered the guitar in towels cause you have to lay all over it scraping the bindings and you don’t want to mar your uncured finish. Scraping is scary as hell. Even though I was changing to new blades I got caught in 2 different spots and the knife went skidding into the finish around the binding. Broke out my modeling airbrush (Harder & Steenbeck Infinity) and carefully tried to patch the color. You can’t tell from a distance but I know it’s there.
I work in TV and have forced time off Dec into Jan. I’m in the burbs of Chicago. Even thought the garage is insulated with an insulated door the garage hovers around 40F this time of year. I heated my garage with a propane space heater to do the paint work. One of those jet type of heaters. This heater gets me to ~60-62F. I learned nitro wants to be warmer to spray correctly so I let the guitar sit until April when it is warmer and my space heater can get the garage up to 70F. I didn’t want to spray the clear in under 65F. I also set the nitro in a pan of hot water to warm it up.
I did a light sanding of the surface with 1200 grit. Wiped it down with Naptha to remove finger print oils and anything the guitar picked up hanging around for 3 months. Then wiped it with an anti-static tac cloth. Sprayed 3 coats of clear a day for 4 days. Let is cure for 30 days.
I again watched a ton of vids on level sanding and wet sanding and polishing. I do not have a wheel and all the finishers did not recommend a newbie using a wheel cause it can quickly eat thru your finish. So it was time to hand sand. I got very good 3M silica carbide sand paper. And yes there is crappy sandpaper and good sand paper. Buy the good stuff. It lasts longer, doesn’t gum up and is easy to remove pearls from. I took extreme care not to saturate with water around any openings. And to ensure, I rubbed some paste wax into the holes. I used some small blocks of wood, erasers and a small hand sanding pad. Started with the finest grit paper to remove orange peel which was 600. Did multiple passes with 800, 1000, 1200, 1500, 2000. When I got to 2500 I could not get the super fine scratches out of the top coat and get the super glass look. I moved onto a polishing system of Medium, Fine and Swirl Remover. It helped a little but I was still not happy. A wheel spins so fast that it heats the lacquer and those scratches melt away. I don’t have a wheel or know of anyone with a wheel. Then I remembered a dude using polishing pads for a hand drill. So I ordered up a kit and went to work with the polishing compounds. I tried a few different density foam pads to see what they would do. Again practicing on the back. Holy shit!!! It’s like 90% better and I am so close to that glass looking super shine. I finished up with McGuires Ultimate Compound and boom! 95% better and something I can live with. It’s not perfect and you can see the fine hair scratches up close but at arms length you can’t. I wax all my guitars.
I bought some fish tank tubing and labeled them so I could fish the pots to their respective holes. Strung it up with my Dean Markley Blue Steel Light Gauge strings. Got out my gauges and set the bridge height then the pick ups. Plugged it in and WOW!!. It sounded way better than I ever thought. This is my first maple guitar and it is bright sounding. Adjusted the pickups and poles a little and took some of the brightness down. I then adjust the intonation and was ready to rock. First song? Working Man of course. 2nd song? Fly By Night.
There are only 2 things that this guitar needs a pros touch on. The low E wants to pop out of the saddle when playing aggressively. I guess heavier gauge strings solve that??? Maybe the luthier can file the notch deeper. The frets need to be dressed. For a $250 dollar kit this guitar is way beyond what I was expecting. It sounds and plays great. The quality of the body and neck is beyond amazing for a kit. The wood is really beautiful and shows nicely thru amber. I just couldn’t be happier with the quality of this kit and what I could achieve with this being my first real build from scratch.
Thanks Solomusic for a fun project that I will always remember!!”
-Chris Ryan


One response to “Guitar Of The Month – December, 2023”
Chris (and Solo😉),
Nice work on your guitar, that turned out great.
And thank you for the details on your build, there are so many, “live and learn, “ lessons here, it is greatly appreciated that your shared your experiences, both good and bad, what worked and didn’t work.
I was lucky enough to see Prototype #6 of AL’s white 335 once, maybe your next project? https://rainbowmusicshop.com/interesting_guitars.html (first row of this page)
Good luck with future build(s), whatever they may be.
Todd