Guitar Of The Month – March, 2022
Congratulations goes out to Clinton Gann for his guitar build, to earn him Guitar of the Month for March 2022.
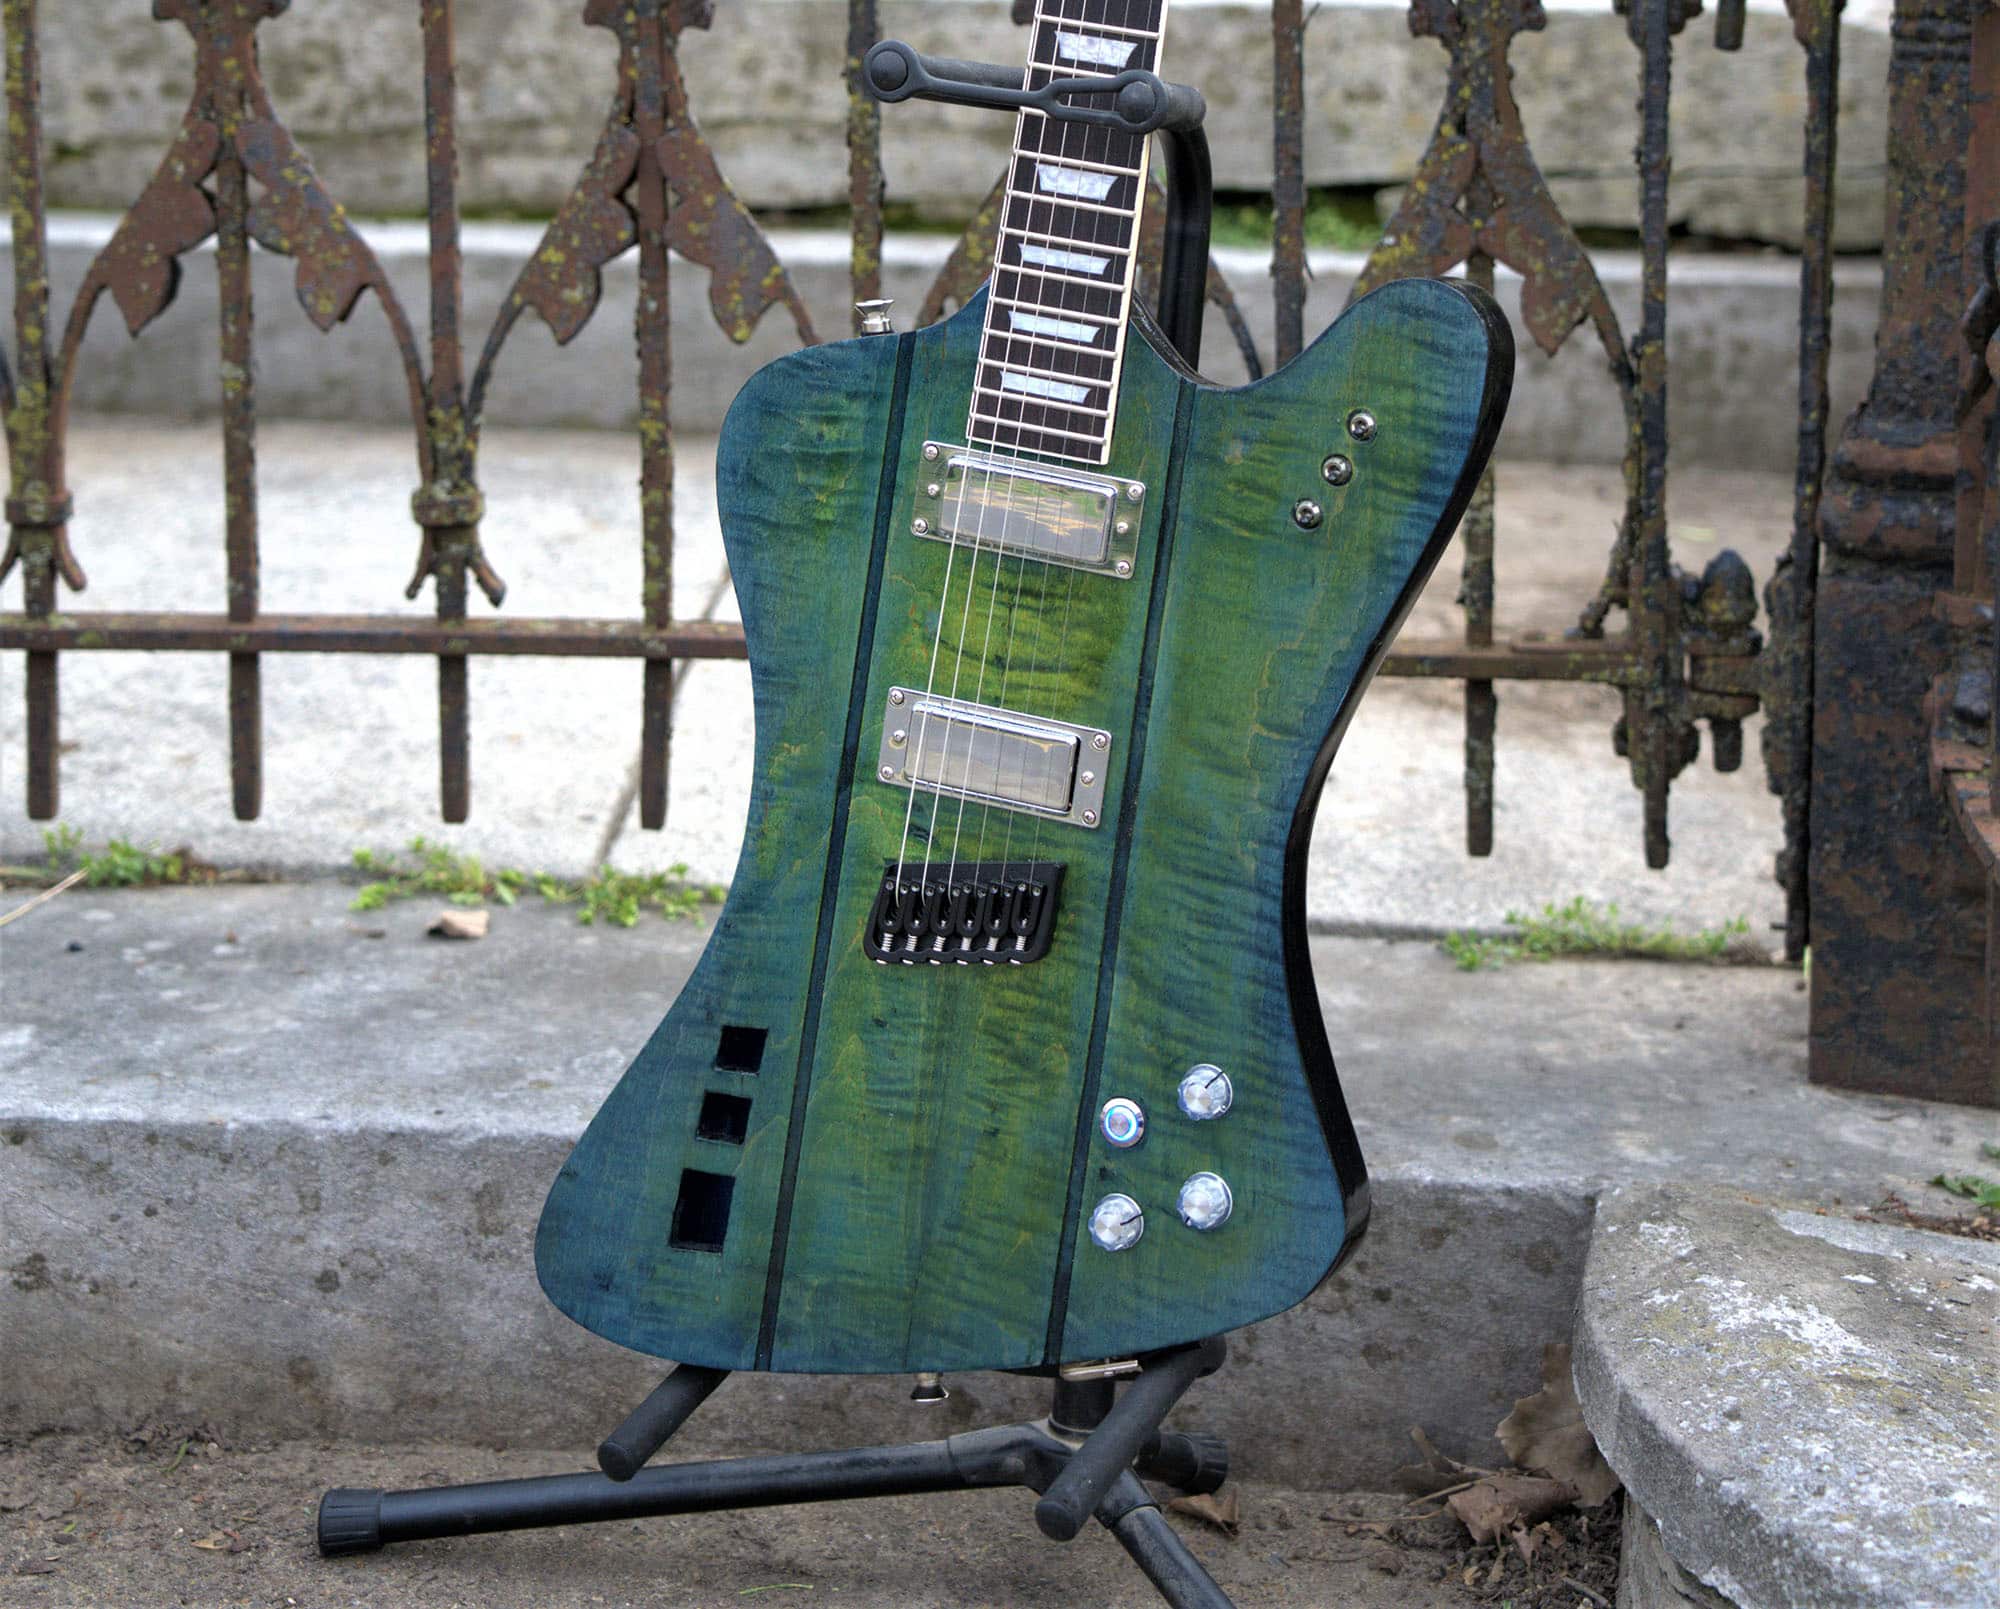
Clinton used our FBK-1 DIY kit as the basis to create his guitar.
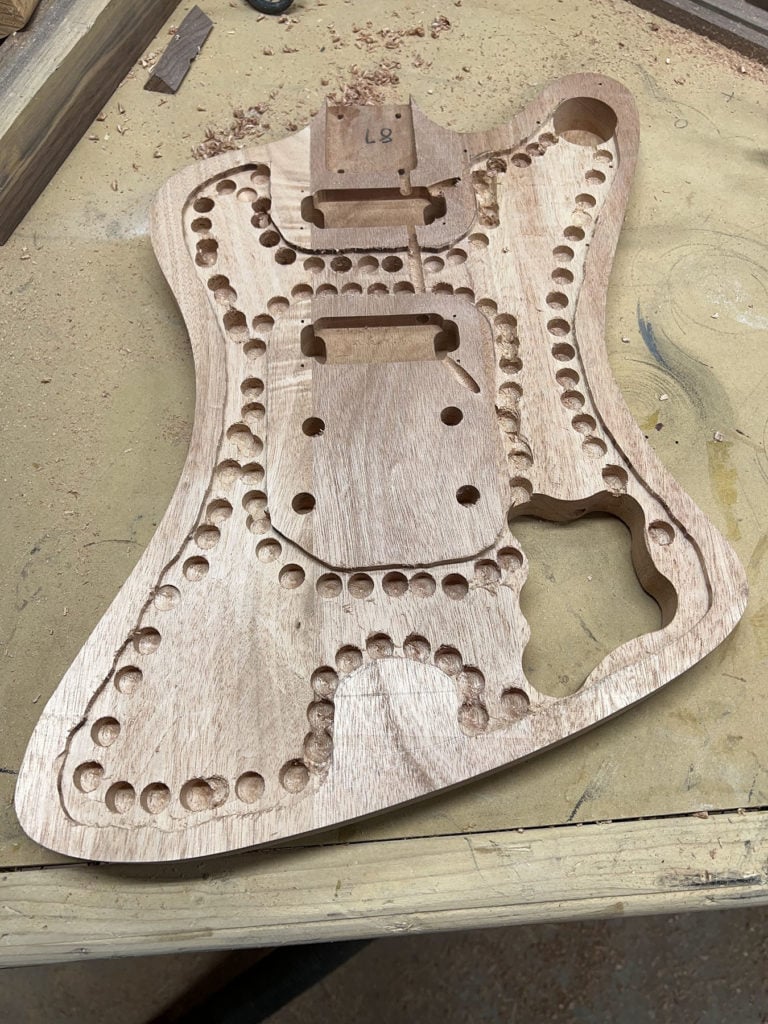
“My wife got me a FBK-1 kit for christmas 2021. I knew I did not want something off the shelf so decided to get a little weird. The FBK has a taller section in the middle so step 1 was to make that flat. First I started by very slowly planing the body flat and then drew an outline of where I wanted it to be hollow. From there it was lots and lots and lots of routing. I put a forstner bit in my plunge router and followed the line as close as I could. I then took a straight router bit and followed all the edges. In hindsight, I should have made a template to get a little bit more consistent wall depths, but no one will ever know (except you all).
At this point I also shaped the neck to allow more access to the upper frets, moving one of the neck screws, and adding recessed ferrals. I went back and forth on pickup choice and now was the time to decide mini humbuckers or humbuckers or trons. I was really close to using the Solo FT style humbuckers because of the look, but decided to go weird again. I put in two body and one under bridge piezo pickup to get that acoustic sound(spoiler doesn’t sound acoustic but sounds good.) which also led to my bridge choice.
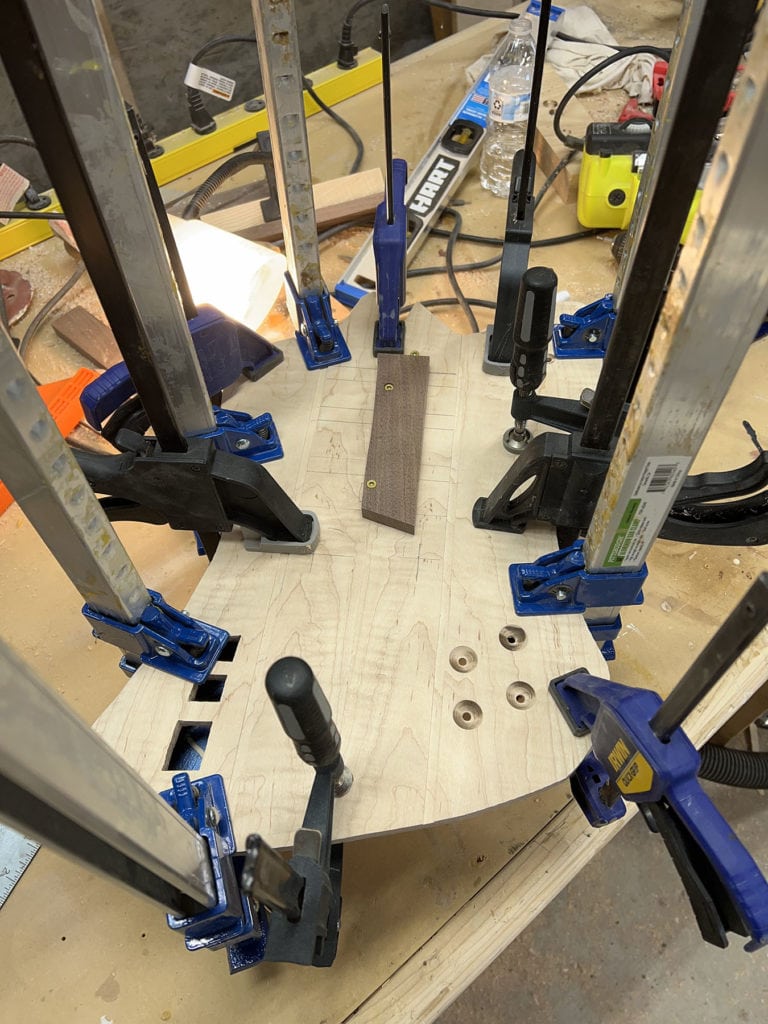
I had ordered a hipshot fixed bridge with compensated saddles for another guitar but ended up not using it. This really shouldn’t work as well as it does. It intonates well and the string through gives it a clean look. I took dowels and plugged the bridge and tailpiece holes since I wasn’t using them. I am getting ahead of myself. I need a new top! I have some beautiful flamed maple from a local lumber yard that was 5/8ths and 10″ wide. I resawed that with my table saw and then sanded smooth with 80 grit on a belt sander. I bookmatched them and glued them at the seam with titebond II and a pinch of salt. Clamped the two pieces together by putting stops on both sides of the new top and then lifting in the middle, applying glue, and pressing back down. I put some scrap wood on top and then put my planer on there for added weight. This method is now my go to for joining bookmatched pieces.
While allowing 24 hours for that to dry, I took a scrap of the maple and shaped it and the headstock with a band saw. I love the FBK “upside down” headstock!
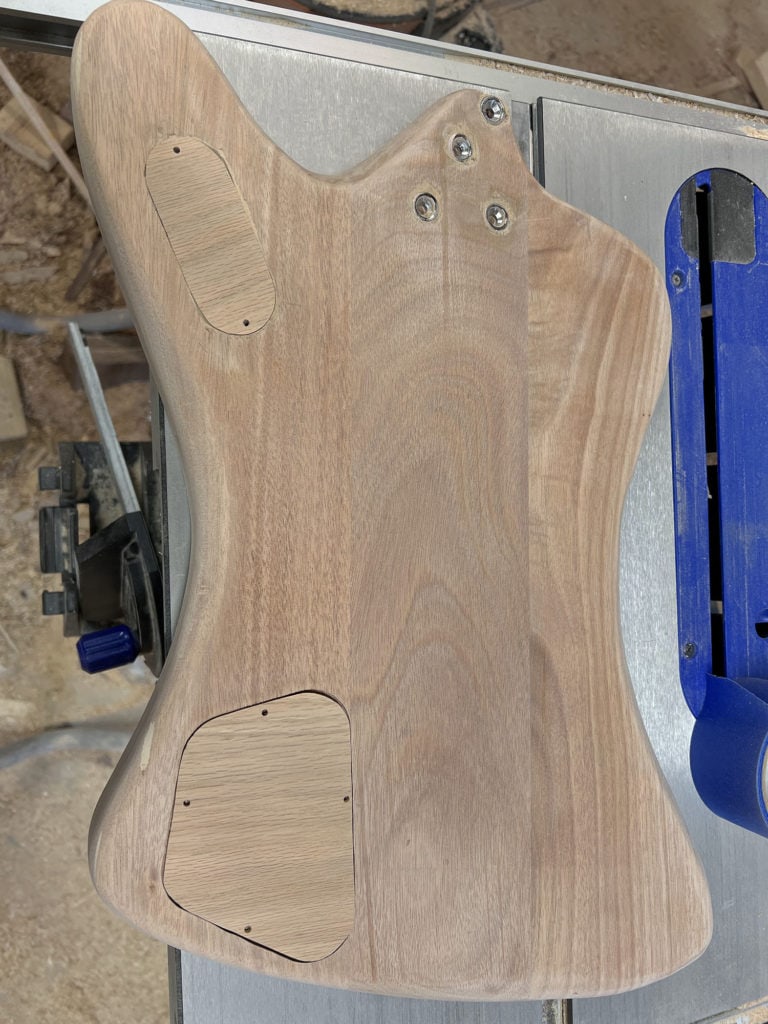
With 2 leds, killswitch, 3 spst switches, killswitch, blend knob, push/push volume knob, preamp and battery I needed to plan it out. I went back and forth on this decision about 1000 times before I ended up with the final layout. With the final layout I needed another access point from the back. I took an old cover and used it as a template and cut that out. I loosely tied everything together and used some foam to place my electronics. I then permanently attached the two leds that were going to be the light source for the sound holes since once the top was on they would be super hard to get to. Next I mapped out where I wanted my 3 toggles, 4 knobs and 3 sound holes. I used my plung router again with a bit that recessed the knobs a little bit. The squares, I drilled each corner then used a jig saw to cut the squares. The time has come where the body meets her new top. I sanded both surfaces with 80/120/240/400 by hand on the body and with a random orbital on the top. Then came the fun part, the day I decided to glue up the top, the weather took a nosedive and my shop is not heated. So, I glued it up with regular titebond and a pinch of salt, clamped it with every clamp I had and let it sleep in the guest bathroom for 48 hours. While this was drying, I cut out two electronics back covers out of some of the same flamed maple.
I block sanded the maple with 300/400/600, wet the wood with water, and sanded with 600 again. I got my Keda dye, 91% rubbing alcohol, glass bowls, measuring spoon, paper towels(the good blue ones) and gloves. I had blue in my head from the beginning and at first thought it was going to be a solid blue so I started with 1/2 tsp black dye and 2 tsp alcohol and covered the whole thing. Let it dry for 30 minutes and then sanded it back with the random orbital and 600 grit. Next I mixed up the blue. I wanted a deep blue so I went 1 tsp of blue and 2 tsp alcohol x3 and laid it on thick. Waited 30 minutes, sanded with random orbital and 600. Now I had black with blue on the flames. This is where things went wrong but also right. I still had my black and I accidentally added a streak of black. While trying to wipe that off, I got some yellow on my rag and it turned this beautiful shade of green. So I laid down another layer of solid blue, sanded back then did blue again but while it was still wet added yellow to the middle to get a green to blue burst effect. This wasn’t what was planned but I am thrilled with the results. Once it dried I lightly hand sanded with 800 grit wet dry paper and hit it with a single thin coat of sanding sealer (Mohawk M102-0413). This locks the dye down when handling and taping. At the same time as dying the top, I also dyed the back panels and the truss rod cover the same green both front and back, but finished them with some krylon gloss and didn’t sand.
Next I taped off the top and fretboard sanded everything down with 120/300 with the orbital on the back and by hand everywhere else. I can’t stress enough how important this step is. Painting gloss black shows EVERYTHING.
I then painted with Krylon Gloss Black paint/primer. Then Ironlak basic Gloss Black once flashed. I let that hang in the shop for a few days then wet sanded the whole thing with 600/800/1000. Then I went to the clear coat. I love using max 2k 2 part clear as it dries fast and looks deep. I like to warm up the max 2k by filling a bucket with hot water and let it soak for about 10 minutes. I sprayed even coats horizontally first across everything and let that flash for about ten minutes and then went back and sprayed vertical. Next was can two where I go diagonally and make sure to get the weird spots as good as possible and I let that cure for 24 hours. I then wet sand with 1000/2000 grit by hand using a 9v battery as my block. Now the fun part of adding all the candy!
On the headstock I went with ToneNinjas machine heads as they were one of the few that had a light locking left-handed 6 on one side layout. I replaced the nut with a Graph Tech Black TUSQ XLfor 1/4 Epiphone Style post 2014. It fit well but had to sand down the edges to make it flush. The pickup install was pretty easy. I put one of the piezos by the soundhole and the other between the two mini humbuckers. I used a chisel to cut out a recess for the bridge piezo. I used a drill press to drill my string through holes and then a hand drill to recess the ferals in the back. Ran all the wires to the three toggle switches, then the piezo to one side of the blend pot and the minis to the other. The output of the blend knob runs into the preamp which has 5 different settings, I have a feeling this is going to get replaced with something less mild like a psycho knob. From the preamp to the master volume to the output switch. I know it doesn’t have a tone knob and I am 100% ok with that. The 4th hole is an Iron Age LED killswitch for my inner buckethead – very easy to install. The LED for the killswitch and soundhole LEDs all go to the push/push volume knob so I don’t always have to be a rockstar. One 9v powers the LEDs and the preamp. Pre Drilled for the hipshot and installed that at the angle I had measured out and I think it looks fantastic.
I then attached the neck and checked the action with a straight edge, adjusted the truss rod a little and preset the bridge to what I thought it would be. I put on the truss rod cover, strung it up, put on the backplates, plugged it in and it was glorious. I had to take the strings off and address two of the frets that had high spots. Used some polish and a dremel on the frets after taping up the fretboard, then strung it up again and have been rocking it. It does have a bit of nose dive which I addressed with some wheel balancing weights in the electronics cavity and now it feels and plays like a chambered FBK 1 should.
This was my 5th solo kit and I am currently trying to decide which one is next.”
-Clinton Gann


One response to “Guitar Of The Month – March, 2022”
Wow Clinton, what a nice build. You have skills friend! I do find that some of the coolest finishes happen by accident, or by allowing things to take their own direction. Very creative, looks awesome!
Respectfully,
Jason P.