Guitar Of The Month – September, 2021
Congratulations goes out to Steve Baric for his guitar build, to earn him Guitar of the Month for September 2021.
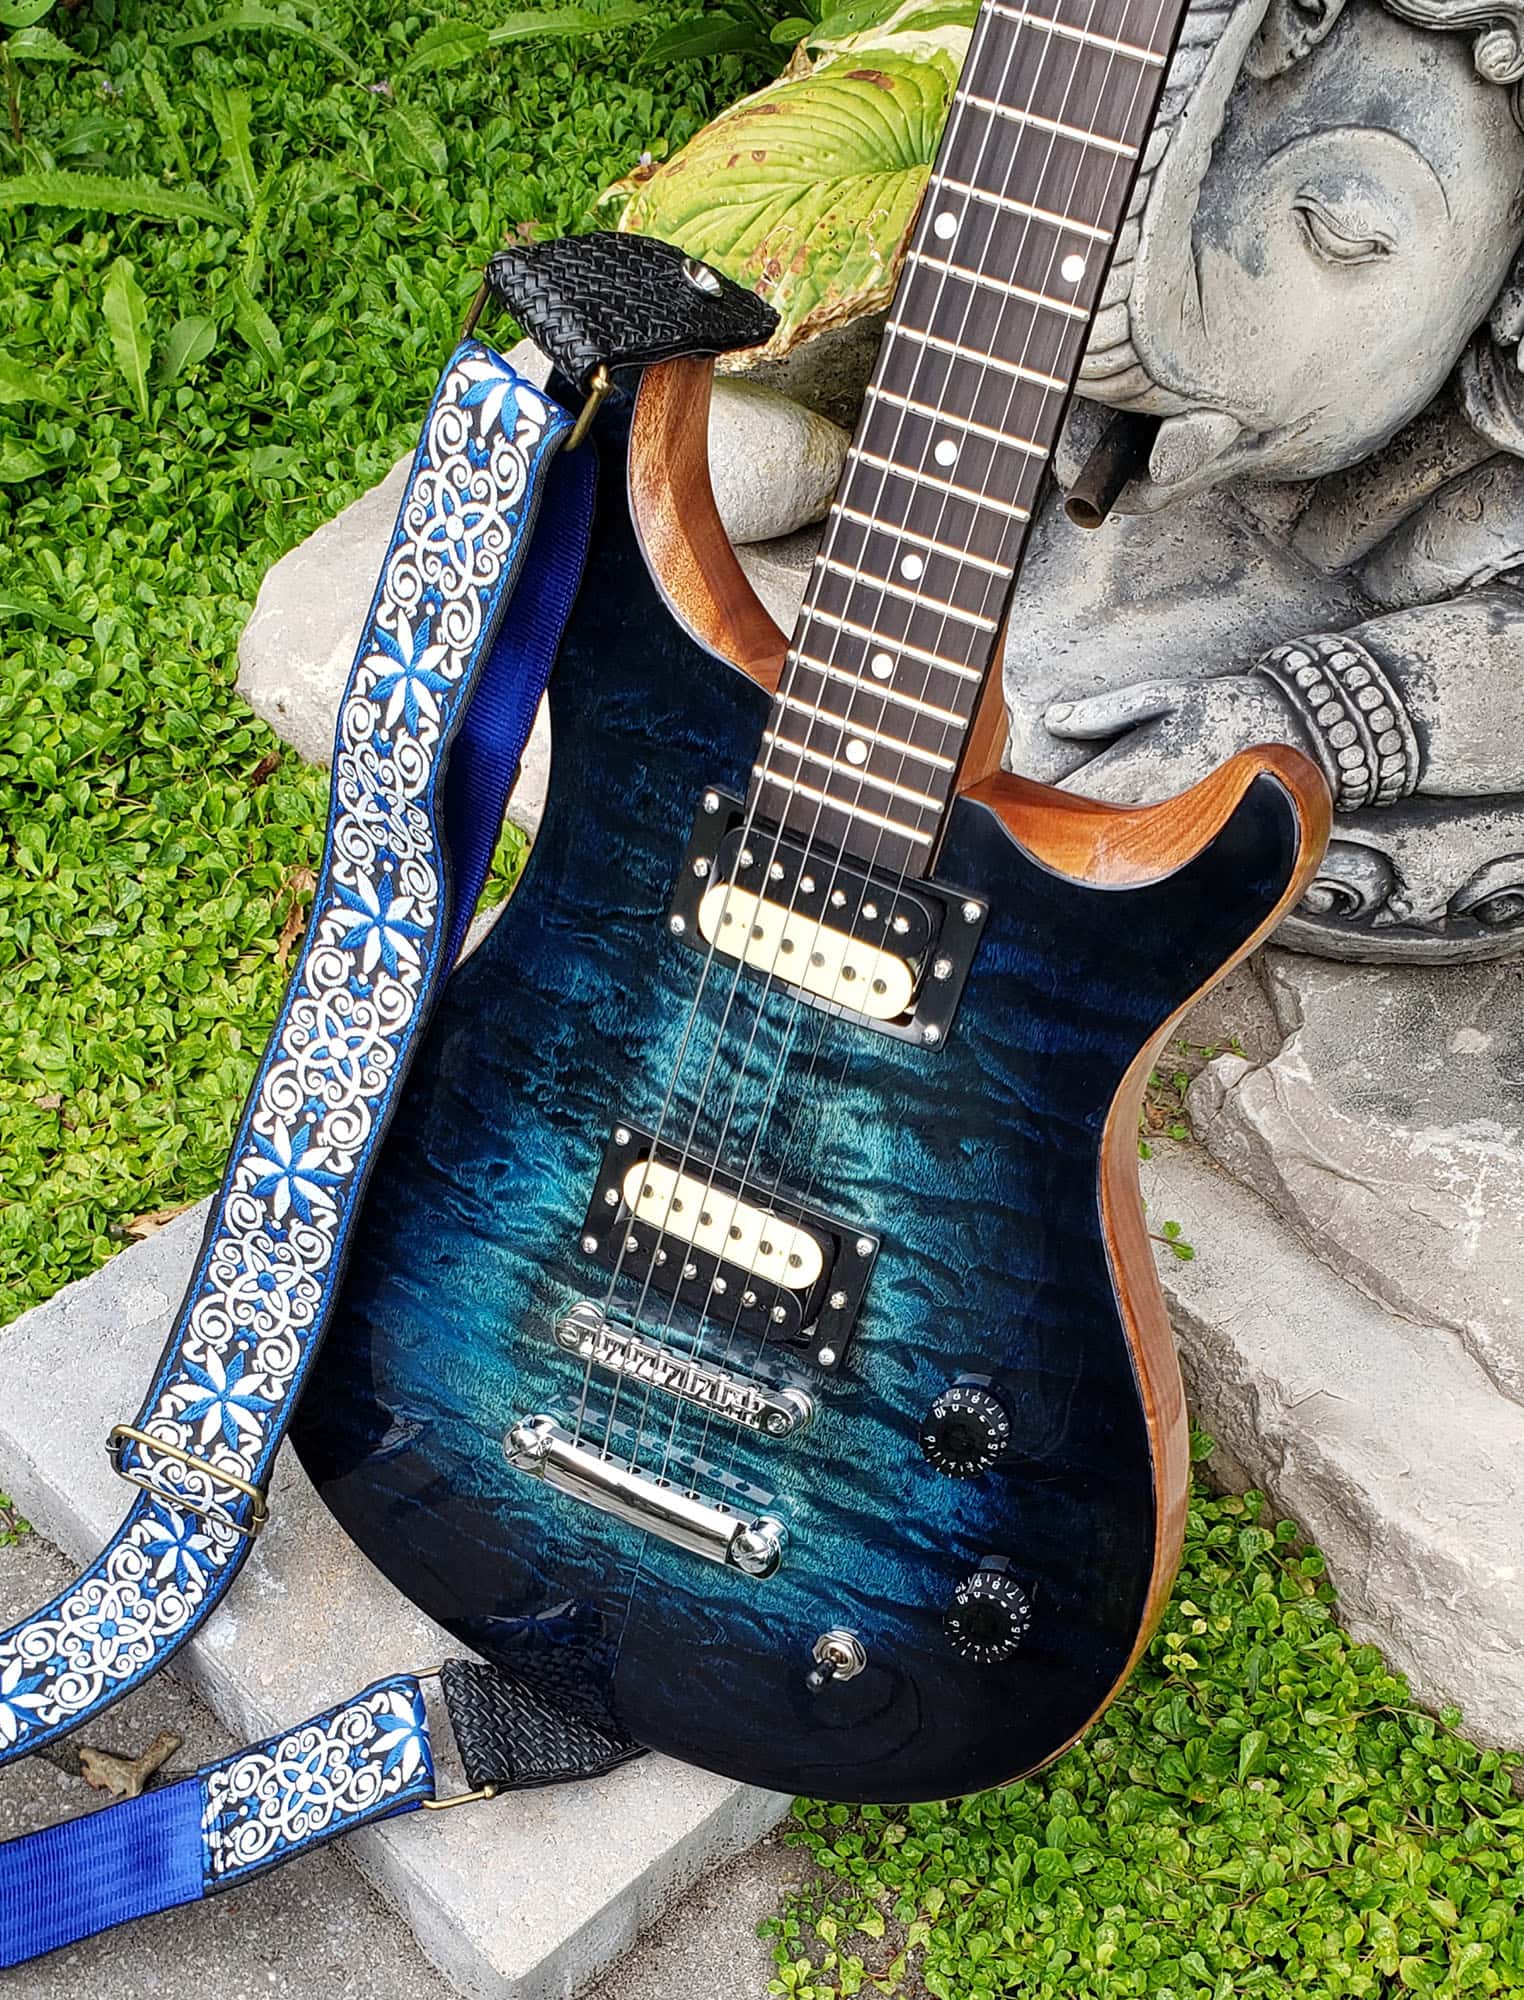
Steve used our PRK-10 DIY kit as the basis to create his guitar.
“Here is a PRK-10 I just finished for a friend of mine. The top is done in a deep ocean burst I call “Vellamo,” after the Finnish goddess of the sea.
My friend didn’t want any modifications, so this is all out-of-the-box hardware. I achieved the intense but translucent colour on the quilted top by using Angelus leather dyes. I started by dying the entire top in jet black to highlight the grain, then sanded that back to almost white. Then it was a process of blending with turquoise and navy blue, and thinning as necessary with their neutral (clear) dye.
The leather dyes are really easy to use, but can be messy. They dry quickly and are easy to blend, but don’t affect the grain. And yes, you CAN lighten colours if you need to, which is much easier to deal with than oil-based stains or paints.
While the top dried, I glued the neck in place and made sure it was straight. I taped off the headstock and hit it with a few coats of Dupli-Color black (Chrysler Brilliant Black Pearl, if you want to know), and dashed my signature on there with a Sharpie acrylic paint pen.
Then started the slow process of finishing the neck and body. I love the colour of oiled mahogany, so after a lot of careful sanding and prep, I applied Tried and Ture Danish Oil to the neck and body (including the fretboard). You have to let this soak in for about 15 minutes, then rub it off and cure for 8 hours before recoating. Before each coat, you burnish the wood with 0000 steel wool. I applied six coats of the Danish oil this way (so, three days), then moved on to Tried and True Varnish Oil (basically Danish + pine resin). This goes on the same way, but needs 24 hours to cure between coats. I gave this four full coats, and then spent a few days just burnishing and buffing by hand to get a nice sheen and smooth, consistent finish.
I like oiled guitar necks. I’m not a fan of painted or clear coated necks if given the option.
Before doing ANY clearcoat, you have to let an oil finish cure for at least two weeks. I let this one sit for three weeks. For a topcoat on only the body and the front of the headstock, I turned to a 2K polyurethane. I tried a new product (new to Canada at least) from a company in Finland called Car-Rep. This poly is different from most catalyzed polyurethanes because even though the two components are combined in the can, they don’t catalyze until they hit the air. This gives it unlimited shelf life (as opposed to the usual 24 to 48 hours), and supposedly makes it a little easier to work with.
It wasn’t easier. In fact, it was quite a challenge first to deal with a HUGE amount of orange peel, and then some chemical blush. But, patience, lots of sanding, and enough sunny days (always do this outside…I got a spray tent for Father’s Day this year for exactly this purpose), and lots more sanding and polishing, and we got ourselves a pretty glassy surface.
[NOTE: any problems I’ve had with this product were entirely user error and inexperience. Car-Rep’s support team was coaching me through the fixes via Instagram messaging the whole way. Highly recommend dealing with them for customer service!]
Once I was happy with the end product on the finish, I was able to get into the setup. Using all my new tools from Solo, I got the neck nice and straight, rocked and leveled the frets, and then crowned everything. I polished them up using my Hosco fret rubbers, and finally with a bit of 8000 grit polishing paper. Then I gave the fretboard a quick oil with some Dunlop fingerboard deep conditioner. After all of that, we just mounted up the hardware and got ready to roll.
My buddy is mostly into chords and jazz, so he sent over a set of D’Addario Jazz Light flat wound strings (11 – 50), which is a heavier gauge than I usually do setup for. The neck held up under tension though, and I’ve put off filing in the nut slots for the time being just to see how it plays. Set up was pretty quick, since I’d already done the fret work. The bridge height was quick to set, but I put the tailpiece a little closer to parallel just because of the higher tension on the strings. I’ve found most Solo bridges come out of the box pretty close to intonation, so that rarely takes much effort.
Plugged in, the thing plays like a champ. Remember, this is with NO modifications at all, just following the instructions to the letter and setting the pickups to PRS standard (actually slightly lower). I was surprised how high the pickup output is really. But they sound fantastic…really nice and warm on clean tones; very little buzz outside the normal house noise; really punchy with a bit of overdrive, but warm when it’s rolled back. At this gauge, probably not where I’d do a ton of shredding, but it handles jazz riffing amazingly well and is a really good standup guitar. I can see him getting a lot of use out of it, and I’ve already been getting orders for more like it (but…they’ll have to wait until next summer now that spraying season is winding down).
PS: The strap is a handmade strap from an independent maker in the UK called VeganGuitarStraps. I’ve been following her on Instagram for a while, and picked this up on Etsy. It’s just such a good match I couldn’t pass it up.”
-Steve Baric


8 Responses to “Guitar Of The Month – September, 2021”
Awesome job and congrats for getting Guitar of the Month!
Nice burst….
Guitarman
Kudos Steve on a very nice build! Love the finish choices and the blue burst is gorgeous. Sure doesn’t look like a kit guitar!
(Cheers from another Finn luthier named Steve, in SK)
Fantastic, I’m looking to do something similar with a swamp ash S kit and you gave me some great ideas although i’ll probably go with lacquer for the clear.
Sweet job. Looks awesome!!!Love the color
Just fantastic ; aways grat to see the work that the peopl do on the guitars l iust great . keep it up ;
Nice job on your finish! I’m nearing the buffing stage of an SG style with a nearly identical color scheme, and it’s turning out quite nicely.
Too bad I can’t post a picture here.
Just an absolutely amazing job on this guitar! Congratulations!