Guitar Of The Month – April, 2023

Congratulations goes out to Randy K for his guitar build, to earn him Guitar of the Month for April 2023.
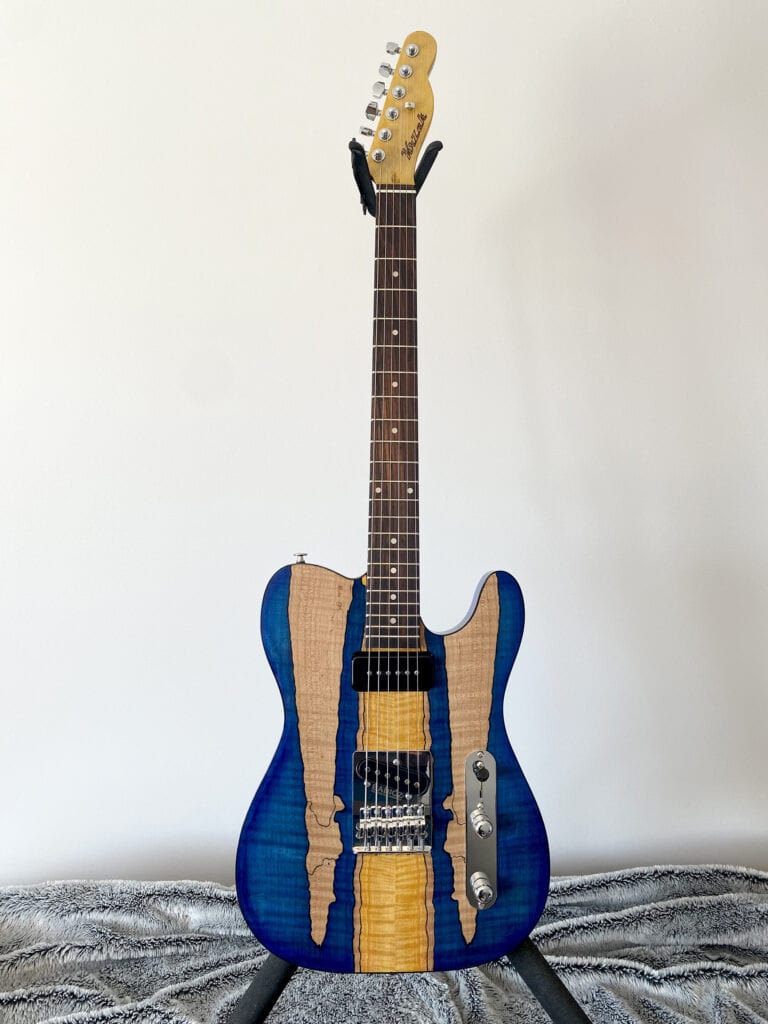
Randy used our TCK-1SM kit as the basis to create his guitar.
“This is my second spalted maple guitar kit build. The first one was the LP style kit which I decided to complete in a natural finish to highlight the unique patterns in the wood grain. Most of the designs I have seen are either natural or in a single colour stain. This time I wanted to try something different. So, for the TC kit my idea was to highlight the areas between the lines of the spalted maple patterns in the wood with a combination of colour and natural wood while preserving and popping the figure in the maple. With that in mind I moved on to choosing the colours that suited the grain pattern and figuring in the wood.
My go-to process is to prepare colour swatches using pieces of similar wood to see how the colours take and practice the application process – especially when blending more than one colour or creating a burst effect. My choice for this project was a combination of turquoise and blue surrounding the body complimented by a gold/tan blend for the centre and head stock. Angelus leather dyes were used because I like the depth of colour and penetration they provide and do not look muddy. First I filled the screw holes for the pickguard because I did not want to cover the unique grain pattern in this piece. After lightly sanding the body to remove scratches and any residual glue marks I taped off the areas I wanted to leave natural and applied several coats of sanding sealer. Marking off the areas to be left natural proved to be relatively easy using semitransparent masking tape to follow the dark lines in the spalted surface. Following that application I re-taped the area and create various dilutions of the dyes and begin the application process with cut-up staining rags. My process is to apply two coats and sand back until I am happy with the result – reapplying as necessary until the grain pops. To set the dyes I then spray Mohawk vinyl sanding sealer to fix the colours. To complete the look I apply the dyes at full strength around the edge with an air brush and create a burst effect then apply additional coats of CrystaLac sanding sealer. The body was then finished with many coats of CrystaLac Bright Tone gloss.
The neck was finished using the gold/tan blend on the top of the headstock to match the centre line colour applied on the body. The dye was also applied on the back side of the neck and sanded back to look more natural while leaving a subtle tone. I chose to top coat the neck with Tru-oil because I like the tone, feel and durability of the finish.
The next step in my process is to hang the neck and body for several days to let it cure and then compound and buff the finish before applying the hardware and electronics.
For this project I wanted to use a P90 in the neck position. To do this I had to route the cavity to fit the pickup. I chose to use a Seymour Duncan Antiquity bridge pickup because I wanted the right amount of crunch even though it would be in the neck position. The bridge pickup is a stock TC single coil at the moment. I wasn’t sure what resistance values to use for the pots given this pickup combination so I decided to use Obsidian Wire’s Custom Universal wiring package which includes a mode switch to let you adjust the values. At this point I am using the HS mode and I find the sound I enjoy most is with the pickup selector in the middle/both position. The crunch of the Antiquity P90 in combination with the brighter single coil in the bridge along with the noise cancellation sounds quite good.
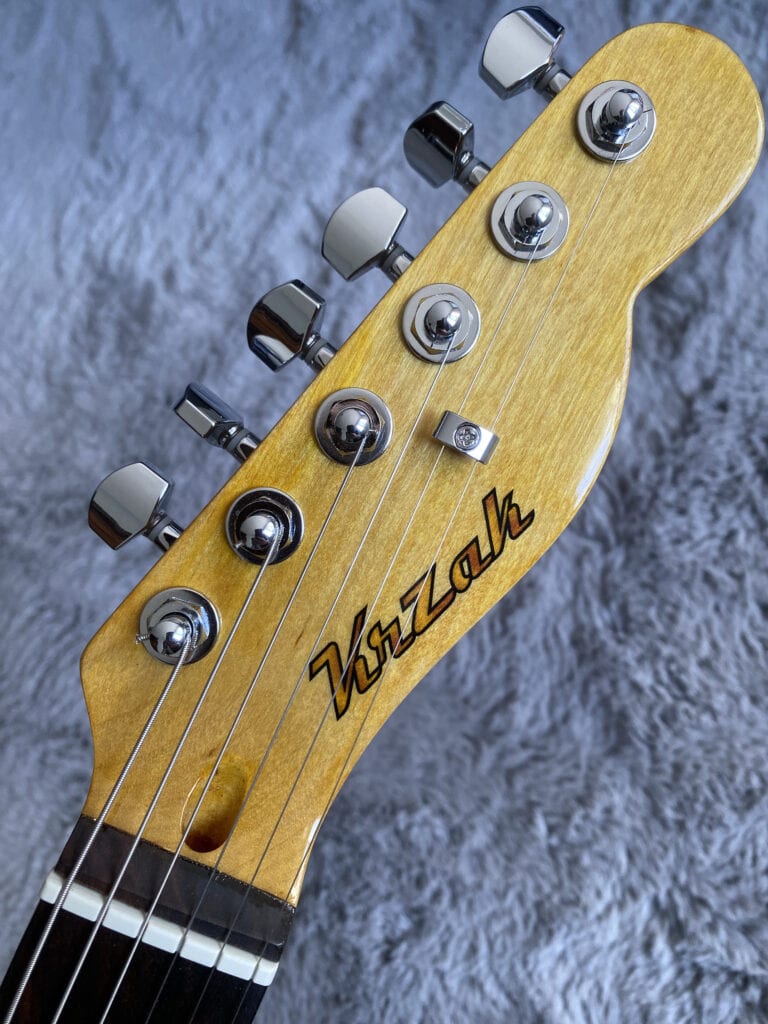
To complete the sound elements of the project I installed a Graph Tech TUSQ nut as well as the Babicz full contact top loader bridge. Hipshot staggered vintage locking machine heads and a Fender Ultra string guide between the B and e strings round out the build.
Setup was pretty straight forward. After adjusting the truss rod a few frets need to be leveled and then re-crowned. All frets were polished and the fret-ends were filed smooth. I strung the guitar with a set of D’Addario XS nickel coated steel 10-46 strings. The neck fit of the Solo kit was quite good and with a little sanding and adjustment I was able to achieve excellent string action and alignment with the pickups.
Overall build time was about 10 weeks with the most effort and time being consumed crafting the body finish and curing process. The guitar feels good, plays well and sounds great with a unique vibe.”
-Randy K