Guitar Of The Month – July, 2023
Congratulations goes out to Darryl Ens for his guitar build, to earn him Guitar of the Month for July 2023.
Darryl used our STK-1M-SD kit as the basis to create his guitar.
“I purchased this Solo Guitar Kit with the intention of making not only a great playing instrument but also one which would stand out visually! I love the look of old worn guitars and the look of many of the new relic models. For many people though the high price of them has made them unattainable. So I set out to build a custom heavy relic look guitar and I set a price cap on the project of $250. I don’t have any fancy tools or a spray booth and so the real goal of this project was trying to show people that they can literally build something like this on their kitchen table and that’s pretty much what I did!
The first thing with the kit was to check if the neck fit the body properly and yes it was perfect! I also checked to see if the frets were level and I was thrilled that they were. Many people simply do not have fret levelling and crowning files or the experience to do this type of work. Getting an inexpensive guitar with level frets is such a joy because it means you can achieve a very low action on the instrument, for easy playability.
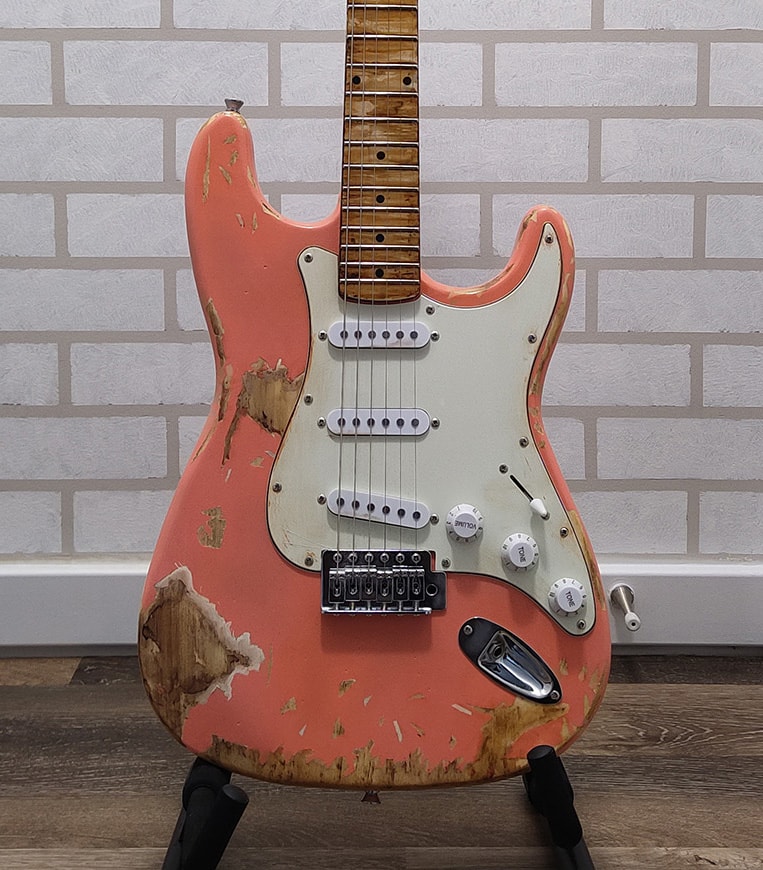
The neck and the body both have a sealer on them and so in order to apply stains or dyes you first need to sand off that sealer. I used a Honeytone amber aniline water stain and also a Rit brand black dye. There were places on the body that I knew would not be painted and so after sanding off the sealer, I began to apply the stain there. You can rub the stain in and then see how it looks and it’s a bit of trial and error but basically you are trying to get the wood to look aged. I guess in a fun way this is where your artistic eye comes in! Once the body was dry and looking like I wanted it too, the job became how to figure out how to create the wear in the body paint. The large manufacturer’s relic process has always been a bit of a secret, but I have always figured there were some templates, stencils or sanding involved. I decided to create my own stencil using masking tape. I cut up all different sizes and shapes and stuck them to the body in a way that I thought looked right. Remember you are simply trying to create the look of a heavily relic’d guitar.
The next step was painting the body. In the past I’ve gone the route of spraying many coats of lacquer and repeatedly sanding and buffing but for this project I wanted it to be done differently and in an easy manner, being that not everyone has a spray booth etc. So I decided to use acrylic paints to achieve the coral color. I mixed white in with coral until I got a faded coral color that I liked. I applied a white primer to the body first and then 2 very thin coats of the coral color. With acrylic paint, less is more, especially when you are trying to achieve a smooth finish. From the beginning I had wanted this project to be done in a simple way and so I ended up using a small foam dollar store roller in order to apply the primer and the paint colors and it worked great, with no runs.
When the paint was dry, I slowly peeled off all of the tape pieces. Then I lightly sanded the many edges where the paint stopped. This creates a smoother look and feel. Visually now you can stand back and look and if needed you can add more stain on parts of the body. By using screwdrivers and other tools I created more wear marks by knocking them against the body in specific areas.
Once I liked how the body looked, I headed outside to give it a few coats of clear. I used a satin clear spray made by Krylon. I think there is lacquer in it because you can clearly smell it. This is not a part that “has” to be done but I have found that the stain can rub off if there isn’t some form of clear over it. Keep in mind, because the body was a light colored basswood, this was why I had used a stain. If the body was a darker wood I may not have used one. After each coat of the clear I lightly sanded it and after the last coat I went over it with 0000 steel wool.
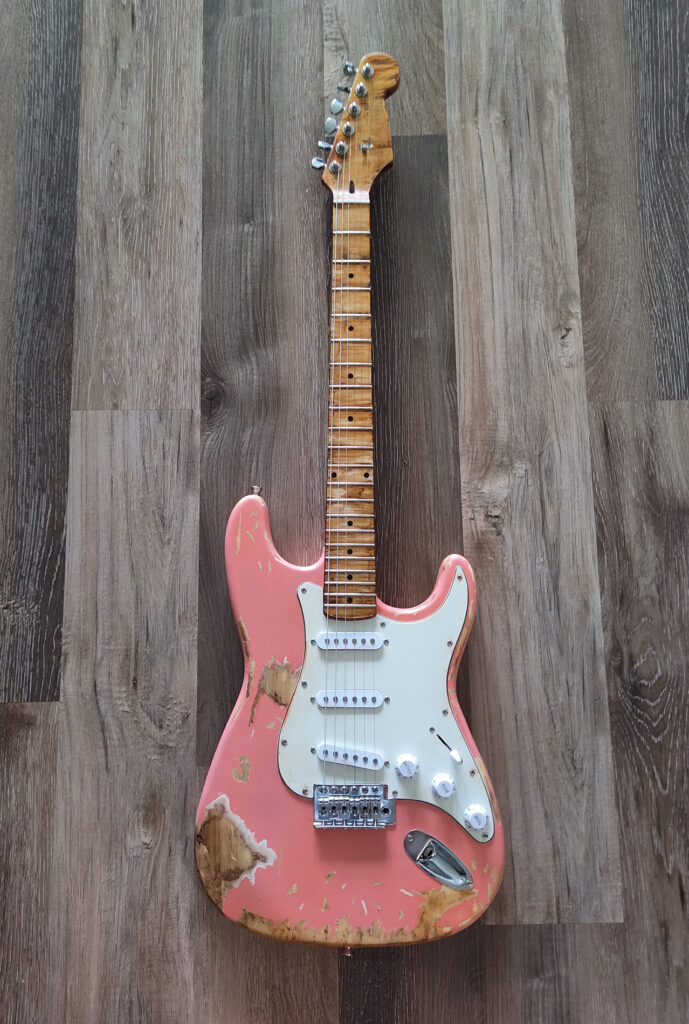
For the neck I decided to do something unique. I could have stained it one uniform color and then sanded in spots to create wear but I decided I wanted a neck that looked extremely old and looked like it had been in a fire. For the back of it I started by using some steel wool that had sat for hours in vinegar. Rubbing it lightly against the wood causes the wood to quickly turn a grey color. I also used this on parts of the fretboard. Then to simulate a burnt wood look on the headstock and fretboard, I applied the aniline stain in ways to create a totally uneven look, with parts that were way darker then others. After a lot of looking and adding and also wiping away stain, I was finally happy with the look. The black dye was then mixed with some satin water based varathane. I then brushed this on part of the back of the neck in order to achieve a darker look. Then I brushed on numerous coats of clear varathane and sanded between each coat and after.
The only thing that isn’t stock on this kit is the pickguard. I had a mint green one lying around, which I sanded in spots and applied the aniline dye to. The hardware I also wore down a bit with various grits of sandpaper. Try to sand in circles and in various directions so that you don’t end up with just a scratched look. For the knobs and pickup covers, a little sanding and some aniline dye in spots can also help achieve a relic’d , worn look. If you are scared what it will look like, I recommend you use an amber or brown colored acrylic paint on the plastics because this way you can just wipe it off with water if you don’t like it.
In the end the only thing I had to fix on the guitar was the nut. It was cut too high. If you don’t have nut files you can buy a very inexpensive set of welding tip cleaners and then use them to lower the nut slots. After the guitar was all assembled and setup, I was extremely pleased with it. The guitar is very resonant and loud acoustically. It has a bit of a chunky neck, which I love. The frets are a nice size and the guitar has a very low easy playing action!
So for anyone out there who thinks you can’t make an inexpensive, great playing, unique looking guitar, well you can! After this one I also built a bright yellow one and both are fantastic instruments!
A big thank you to Solo Guitars for producing such a nice kit. It was a real pleasure building this!”
– Darryl Ens


3 Responses to “Guitar Of The Month – July, 2023”
What an outstanding project. The end result looks amazing, and it was interesting to read all the details of the process behind it.
Looks great, amazing job. A+++
Great looking guitar! I like that you took a totally different approach to painting.