


Description
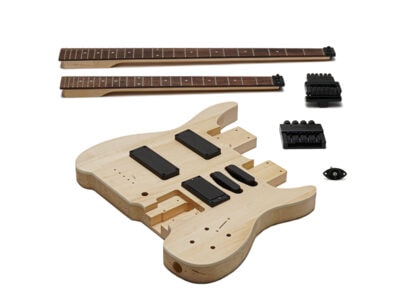
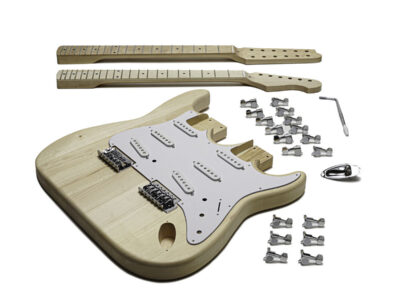
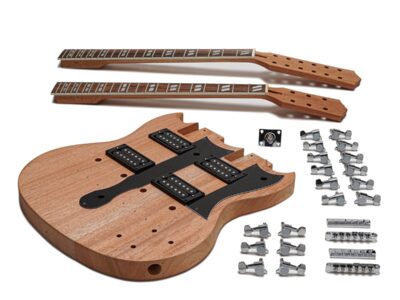
This DIY guitar kit has everything you need for building your own custom Electric Double Neck Guitar. You will only need some basic tools and finishing supplies. This kit includes all parts and step-by-step instructions to build a complete, playable custom guitar. All challenging wood cutting, drilling and shaping has already been professionally done, as well as fret leveling and dressing.
Recommended tools: Solo Guitar Assembly Kit Bolt-on Neck
Kit includes:
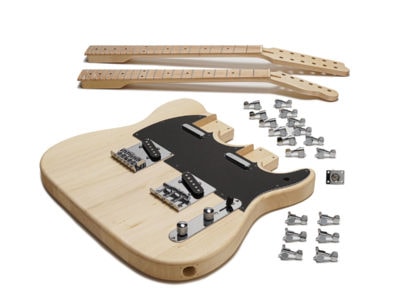
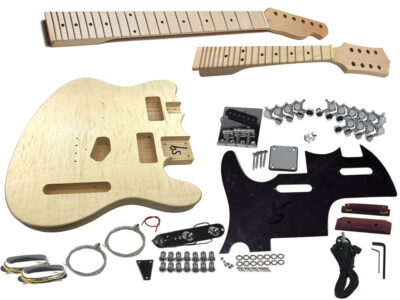
- Basswood body with a poly sealant
- Unfinished 4 string Maple bass neck with Rosewood fingerboard
- Unfinished 6 string Maple guitar neck with Rosewood fingerboard
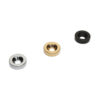
- Threaded hex bushings for 4-string neck
- Tuning machines for 4-string neck
- Threaded hex bushings for 6-string neck
- Tuning machines for 6-string neck
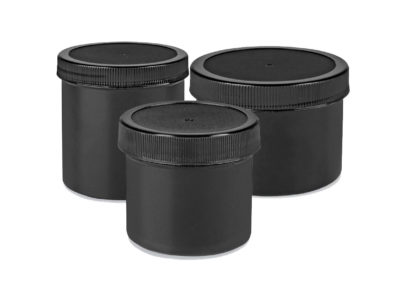
- Truss Rod Covers
- Strings
- 4-string Neck & Bridge Pickups
- 6-string Neck & Bridge Pickups on mounting rings
- 4-string Barrel style bass bridge
- 6-string guitar bridge
- Hex Wrench
- Control Cavity Cover Plate
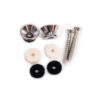
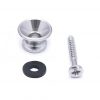
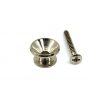
- Strap Buttons
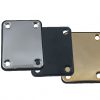
- 4-string Neck Plate
- 6-string Neck Plate
- Switch Plate
- 3-Way Pickup Selector Toggle Switch (includes mounting nut and flat washer)
- 3-Way Toggle Neck Selector Switch
- Control Knobs
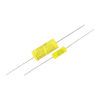
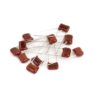
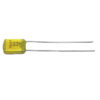
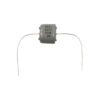
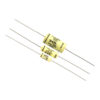
- Control Pots (2 capacitors included for Tone Pots)
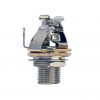
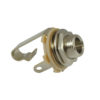
- Jack Plate with an Output Jack
- All mounting screws are included
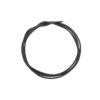
- Cord
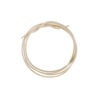
- Wires
IMPORTANT (in addition to our standard return policy): due to their nature kits can be returned only in virtually untouched condition and in original package.


Mason Vukovic –
slapped this kit together in a couple hours after i stained it and then did all the wiring and setup the next day. Works very well! the electronics were a bit difficult to follow but im not too educated on that topic so anyone who is will have a real easy time. the pickups are alright but i noticed that they are significantly quieter than my other brand name guitars so i have to turn up the volume quite a bit to reach the same level. i gigged with the finished kit already and so many people in the crowd were blown away by the super cool double neck! really turns heads. both necks came in great condition and after some sanding and light gloss have great texture for sliding up and down the neck. the tuners hold tune surprisingly well but i did have to drill the holes a little deeper on the back of the heads to get the screws to be able to fit all the way in. overall pleased and i am considering ordering another kit soon!
vanstry (verified owner) –
(Pictures at: https://jvanstry.blogspot.com/2020/12/the-double-neck-guitar-is-finished.html)
The idea of a double neck bass/guitar is something I’ve been interested in for a while. I’ve built a lot of kits over the last couple of years and I decided this would be the last ‘kit’ I did, before I moved on to trying to make my own bodies and eventually necks as well. This is a much more difficult kit than the usually ones, due to size and the addition of another guitar neck, as well as the associated wiring and pickups.
So understand that before you get into it. Especially if you plan on customizing it like I did.
Now the schematics I got for this originally had both necks always ‘on’ (or ‘live’) and the two switches were each three-way pickup selectors. I didn’t like that setup so I made a number of changes in the wiring.
First I took the upper switch and made that a selector for which neck was live/on. You could do ‘Bass – Both – Guitar’, depending on the position of that three-position switch. I left the bottom three-position switch on the guitar to its normal ‘Bridge – Both – Neck’ selection. However, the selector switch that was in my kit was a five way, which I didn’t care for. So I replaced it with an actual three-way. While functionally the same, I didn’t like having two positions that were neck only, and two that were bridge only – which is how you had to wire up the five-way to make it work.
Second I had to change the Volume / Tone pots to deal with the new switching set up. The initial design was one volume, one tone, for each neck. I wanted to have separate volume controls for each pickup, not unlike most Les Paul’s, so what I ended up doing was buying four ‘stacked’ pots. Each pot has two knobs. The inner one is volume, the outer one I wired for tone. So every pickup now has an individual volume and tone control. This made the wiring a little more involved, especially as the outputs from each neck had to go through the selector control between the necks.
The third major change I made was I added a second stereo type output jack. The main jack only puts out whatever you have the neck selector switch set to, while the stereo jack always puts the guitar pickups out on one channel and the bass pickups on a second channel. Each channel is always ‘live’. This would allow you to wire two different amplifier stacks, simultaneously. Otherwise you’d need an A/B foot switch (you do NOT want to run a bass through a guitar stack; you can blow out the amp with the lower bass frequencies).
The paint job is a metallic water-based paint. I shot two coats. On top of that I shot 15 coats of clear gloss (water based) – except for the back of the necks, I shot clear satin on those (I find a gloss finish to be too sticky when playing). I do believe I should have used four coats of grain filler instead of just two, I think the back would have looked nicer, it is a huge piece of wood.
I used conductive paint in ALL of the cavities. I hate hum and the stuff works. I put copper foil on the back of the plastic cover plates and made sure everything was well grounded.
I used Teak oil on the fretboards – three coats.
The frets did need a fair deal of leveling. They weren’t pressed in very consistently from side to side either. I have a leveling bar, which makes the process a lot easier. But then you have to recrown, and polish, all those frets. Which is this case was like 48 frets.
I don’t put the truss rod covers on for about a month or two, because the necks do need time to settle in.
Problems:
The holes for the wire routing coming out of the pickup cavities are too ‘high’ in some cases. Especially with the extra wiring I was running. So I had to widen some of those holes and make them ‘lower’ so I wouldn’t have to worry about the pickups interfering with the wiring and vice-versa.
The small pilot holes for the tuner machines on the guitar neck are really poorly placed. It would have been better not for them to have been drilled at all, as they weren’t uniform, which means the tuners don’t exactly line up. I could have done those better myself.
One of the bass pickups was bad (South pole bar coil blown). This one took me a long time to track down (weeks) – I thought I had mis-wired something. Soapbar pickups are also Expensive! $300 is about what you’re going to pay for a pair. Fortunately I found a pair of Seymour Duncan’s on sale during Black Friday, so I only had to pay about a hundred bucks for a new set. (I have S & D on most of my basses). Part of what made it hard to find a replacement for them is that the size of the soapbar pickups on this bass is NOT one of the standard sizes. It’s more like a 5-string size.
I also didn’t like the way the bass pickups are routed through the guitar pickup cavity. It made changing bass pickups with the strings on really challenging. If I were to do it again, I’d drill a separate passage.
In General:
I would definitely rate this bass/guitar double neck as one of the harder kits. Especially if you’re planning on changing the way it works. I bought this back around May of this year, but I had three other guitars to do first: two Les Paul’s from kits (6 & 12 string with after market pickups and pots), and a custom Jazz Master that wasn’t from a kit that required very special parts and wiring.
A good deal of what slowed me down was waiting for the switch and pots I ordered after deciding to change the way it was wired. The entire thing was finished end of October and then I spent weeks trying to figure out what was wrong with the bass until I finally took out the pickups and found one had a blown coil. Then I sat on it for weeks more until I found replacement soapbar pickups on a Black Friday sale and then had to wait for them.
I may upgrade the guitar pickups as well, seeing as I just put a much better set of bass pickups in it, but for now I think this is enough.
I also put D’Addario strings on both necks and not the strings that came with the kit. I like flat-wounds on my basses these days, and the D’Addario guitar strings are worth the money as well.
Kevin Godin (verified owner) –
I can see why this kit is listed as harder, but I have a strong suspicious I was sent the wrong wiring parts.
The painting went well and all of the hardware mounted in just find. All if the holes and channels were drilled in the right places, and the necks were a very happy and snug fit. A bit of tweeking the action and truss rod after putting some strings on and it’s great.
But I still don’t have the electronics working. The diagram provided shows a 7-lug 3-way switch for the guitar, but a 8-lug 3-way switch was provided. The bass pickups also chop their own wires when installing them on the body, so I had to Dremel out a little notch to prevent damage. I also had to order extra wire for both the “instrument selector” switch in the center (I was short about 3′ of wire with the ground connection as part of it), and I still am short wire for connecting the bass pickups.
That aside, everything arrived pre-wired incorrectly, and I received two tone pots instead of one? I unwired all of it and took at swing at the diagram provided, but I still have no working electronics.
Other than my electronics and wiring woes, everything else feels and installed great. If you don’t know how pots work or how to wire your own stuff without a diagram, I do not recommend this particular kit. This will be my 3rd kit built and it’s the first time I’ve encountered this issue.